Linux oracle 9i图文安装方法一
(编辑:jimmy 日期: 2026/4/11 浏览:2)
版权声明:原创作品,允许转载,转载时请务必以超链接形式标明文章 原始出处 、作者信息和本声明。否则将追究法律责任。http://waringid.blog.51cto.com/65148/47655
在Liunx下安装Oracle数据库软件对于初学者来说是一件不容易的事,本菜鸟在折腾了许久后安装成功,中间过程不敢独享,公布出来分享一下.有问题的地方还请各位大侠指正. 准备工作 系统版本:Redhat Linux Enterprise 4 内核版本:2.6.9-5 Oracle版本:9.2.4 内存容量:512M 硬盘容量:16G 一:安装Linux系统,放入Linux第一张光盘,设置BIOS从光盘引导,启动后进入如下界面:
 按回车键进行图文方式安装.第二个选项是输入"linux test"进行文本方式安装.
 是否对光盘进行测试,如是介质正常的话,建议选"skip"
 没什么好说的,"Next"
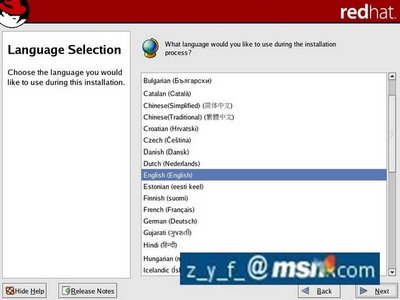 选择系统的语言,可以选"简体中文",但是在以后的安装中可能会出现乱码的现象,为了方便,选"English"
 配置键盘,一般选"U.S.English"
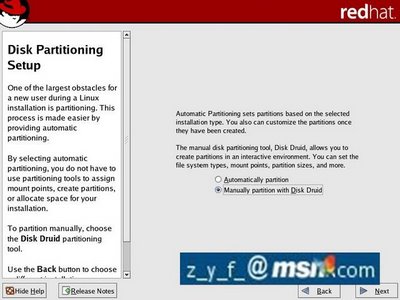 系统的分区选项,这里选手动分区"Manually partition with Disk Druid",因为我们要将Oracle安装在一个较大的分区内,如果自动分区的话,可能会出现空间不够的情况.

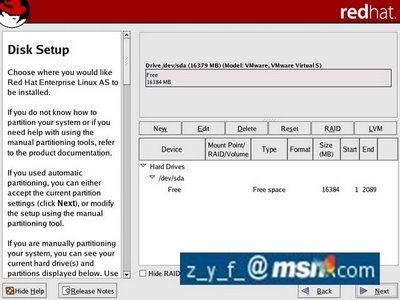 现在进入了具体的分区选项,有几点要注意的,"/"分区是必须的,因为所有的分区就是从它开始,类似Windows一定要有一个主的活动分区一样.我计划Oracle这个软件安装在"/usr"下,这个分区差不多要有8G的空间才行,我的解压都是在这下面进行,如果进行光盘安装就不需这么大了,"swap"交换分区设成1G.其它具体的设置如下:

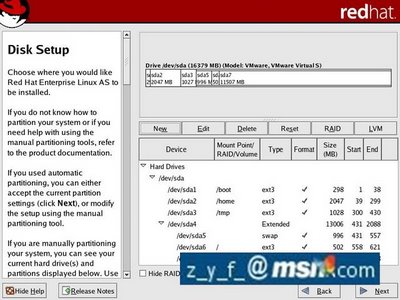 /boot: 300M /: 1500M swap:1G /home: 2G
/tmp: 1G /usr: 10.5G
 是否设置启动密码,一般不选,直接"Next"
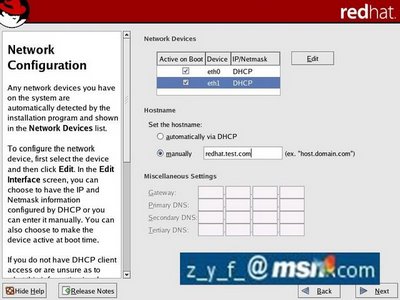 设置网卡,最好是手动指定,这里我选的是"DHCP",可以看到我这里有两块网卡.

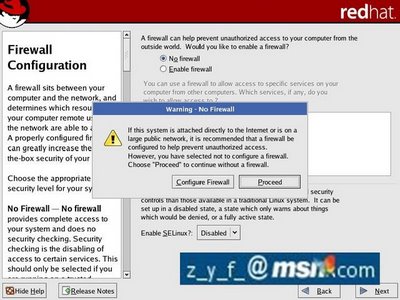 是否启用防火墙及Linux的语法检测,为了方便起见,都设成不启用,如上图示.不过各位如果有安全需要,可以按需开启.
 选择系统所支持的语言,选上简体和繁体中文,这样在显示这些字体的文件时不会出现乱码的情况.
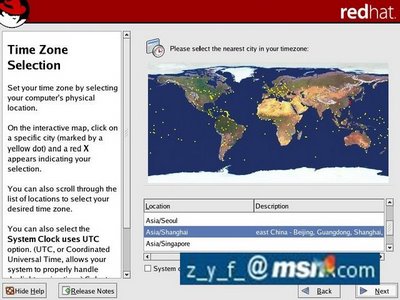 选择所在的时区,这里选的是亚洲/上海"Asia/Shanghai"

设置Linux下管理员root的口令.
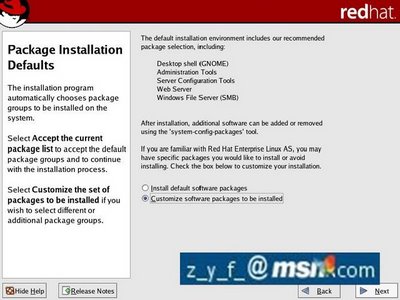 选择自定义安装软件包"Customize software packages to be installed"

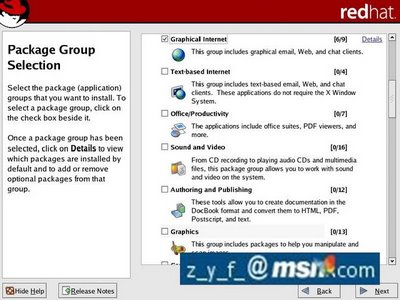

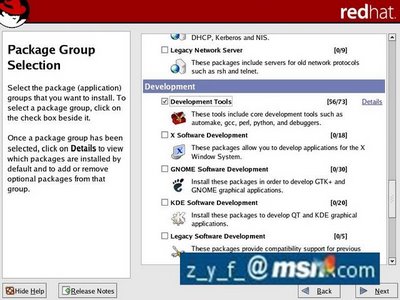

 去掉"GNOME"选"KDE"这个除了个人喜好外,还有一点是如果有远程进行图文安装的话,KDE比较稳定,还有一点是软件开发工具要装,不然后面安装会重新安装组件,具体的软件包选择可以参考上面的图片.
在Liunx下安装Oracle数据库软件对于初学者来说是一件不容易的事,本菜鸟在折腾了许久后安装成功,中间过程不敢独享,公布出来分享一下.有问题的地方还请各位大侠指正. 准备工作 系统版本:Redhat Linux Enterprise 4 内核版本:2.6.9-5 Oracle版本:9.2.4 内存容量:512M 硬盘容量:16G 一:安装Linux系统,放入Linux第一张光盘,设置BIOS从光盘引导,启动后进入如下界面:
按回车键进行图文方式安装.第二个选项是输入"linux test"进行文本方式安装.
是否对光盘进行测试,如是介质正常的话,建议选"skip"
没什么好说的,"Next"
选择系统的语言,可以选"简体中文",但是在以后的安装中可能会出现乱码的现象,为了方便,选"English"
配置键盘,一般选"U.S.English"
系统的分区选项,这里选手动分区"Manually partition with Disk Druid",因为我们要将Oracle安装在一个较大的分区内,如果自动分区的话,可能会出现空间不够的情况.
现在进入了具体的分区选项,有几点要注意的,"/"分区是必须的,因为所有的分区就是从它开始,类似Windows一定要有一个主的活动分区一样.我计划Oracle这个软件安装在"/usr"下,这个分区差不多要有8G的空间才行,我的解压都是在这下面进行,如果进行光盘安装就不需这么大了,"swap"交换分区设成1G.其它具体的设置如下:
/boot: 300M /: 1500M swap:1G /home: 2G /tmp: 1G /usr: 10.5G
是否设置启动密码,一般不选,直接"Next"
设置网卡,最好是手动指定,这里我选的是"DHCP",可以看到我这里有两块网卡.
是否启用防火墙及Linux的语法检测,为了方便起见,都设成不启用,如上图示.不过各位如果有安全需要,可以按需开启.
选择系统所支持的语言,选上简体和繁体中文,这样在显示这些字体的文件时不会出现乱码的情况.
选择所在的时区,这里选的是亚洲/上海"Asia/Shanghai"
设置Linux下管理员root的口令.
选择自定义安装软件包"Customize software packages to be installed"
去掉"GNOME"选"KDE"这个除了个人喜好外,还有一点是如果有远程进行图文安装的话,KDE比较稳定,还有一点是软件开发工具要装,不然后面安装会重新安装组件,具体的软件包选择可以参考上面的图片.下一篇:linux 操作技巧收集_